Writing A Ray Tracer in Go - Part 3
Updated: Sunday, November 21, 2021
This is part 3 of my series on writing a ray/path tracer in Go. Checkout parts 1 and 2.
I’m roughly following the e-book Ray Tracing in One Weekend, but translating all of the code into Go.
All of the code for this post can be found on my Github.
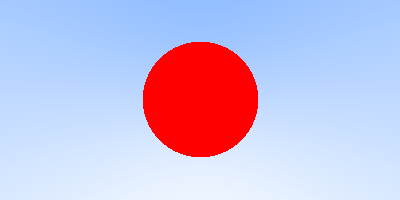
Last time I covered the basics of creating rays, spheres and calculating if a ray intersects a given sphere. In order to visualize our sphere, last time we colored a pixel red if a ray intersected it and some shade between blue and white if it did not. This generated an image like so:
This time around I want to get a little fancier by introducing the concept of shading, implementing anti-aliasing and adding more objects to our world. Finally, I’d like to wrap this post up by discussing some refactoring and design decisions that I made.
Throw Some Shade
Before we implement shading, we need to discuss surface normals. A surface normal is a vector that is perpendicular to the surface of an object and points outward by convention. Recall that in our previous iteration, we were only concerned whether or not our ray intersected our sphere, not where the intersection occurred. In order to calculate our surface normal vector, we now need to know the hitpoint or point of intersection with our sphere.
Here’s our Hit method rewritten to not only return a true/false but also information around the hit. This takes advantage of Go’s ability to return multiple values which comes in pretty handy here.
func (s *Sphere) Hit(r *Ray, tMin float64, tMax float64) (bool, HitRecord) {
    oc := r.Origin.Subtract(s.Center)
    a := r.Direction.Dot(r.Direction)
    b := 2.0 * oc.Dot(r.Direction)
    c := oc.Dot(oc) - s.Radius*s.Radius
    discriminant := b*b - 4*a*c

    rec := HitRecord{}

    if discriminant > 0.0 {
        t := (-b - math.Sqrt(b*b-a*c)) / a
        if t < tMax && t > tMin {
            rec.T = t
            rec.P = r.Point(t)
            rec.Normal = (rec.P.Subtract(s.Center)).DivideScalar(s.Radius)
            return true, rec
        }
        t = (-b + math.Sqrt(b*b-a*c)) / a
        if t < tMax && t > tMin {
            rec.T = t
            rec.P = r.Point(t)
            rec.Normal = (rec.P.Subtract(s.Center)).DivideScalar(s.Radius)
            return true, rec
        }
    }
    return false, rec
}
This also introduces a new struct, the HitRecord:
type HitRecord struct {
    T         float64
    P, Normal Vector
}
Since we still don’t have any lighting in this scene, we are going to color the sphere by converting the length of Normal to a unit vector (between -1 and 1) and then map that to a number between 0 and 1. This will then allow us to calculate an RGB value to shade the sphere.
Running this code gives us the following image:

One thing to note is the jagged edges. Here is a zoomed in version of the same image that focuses on the edges:

Gross. Let’s fix that now.
No More Aliasing
In computer graphics aliasing is the effect that causes signals to become indistinguishable from others. In our project, this causes jaggies because our path tracer still only colors our pixels based on if the ray hit our object or not. There is no in-between.
In other words, our sphere does not blend into the background smoothly as it would if it were being viewed in the real world. We can fix this by introducing sampling.
Level Up With Go
Thanks for reading! While you're here, sign up to receive a free sample chapter of my upcoming guide: Level Up With Go.
No spam. I promise.
Sampling is just what it sounds like, taking a number of different samples and averaging them together to get the final result. This will produce a much more realistic image, but at a cost.
In order to compare the cost, let’s time how long it takes Go to generate the above shaded image.
$ time go run *.go

go run *.go  0.46s user 0.16s system 115% cpu 0.539 total
As you can see, it takes about half a second to render the image with no sampling in place.
Now let’s add our sampling code:
for j := ny - 1; j >= 0; j-- {
  for i := 0; i < nx; i++ {
    rgb := p.Vector{}

    // sample rays for anti-aliasing
    for s := 0; s < 100; s++ {
      u := (float64(i) + rand.Float64()) / float64(nx)
      v := (float64(j) + rand.Float64()) / float64(ny)

      r := camera.RayAt(u, v)
      color := color(&r, &world)
      rgb = rgb.Add(color)
    }

    // average
    rgb = rgb.DivideScalar(float64(ns))
  }
}
Inside our inner write loop, we add another loop to calculate the color of each pixel 100 times, and then average that value to get our final rgb value.
This results in the following, much more aesthetically pleasing image:

Zooming in we can see the jaggies are gone:

Now, let’s see what the cost was.
$ time go run *.go

go run *.go  2.17s user 0.20s system 107% cpu 2.207 total
As you can see, adding the anti-aliasing also added about 4x in processing time. This is because each pixel’s value now has to be calculated 100 times! Increasing/decreasing the size of the image as well as playing around with the number of samples will also increase or decrease this processing time required.
Refactoring and Another Sphere
In previous versions of the code, all of the files were under the same Go package main. In this iteration I moved all of the building blocks of the application such as sphere, vector and ray into a primitives package. I then import this package into the p namespace in main so that these primitives can be used:
import (
    "fmt"

    p "github.com/markphelps/go-trace/primitives"
)
In my opinion this allows for a cleaner separation between library code and it’s usage.
Finally, I’d like to add another sphere to our scene. We could just add it like we did the first sphere, however I think now is a great time to introduce the idea of a world and abstract away the idea of a Hitable object.
The way to accomplish this in Go is to extract an interface. One difference between Go and other languages is that interfaces in Go are implemented implicitly. This is better shown through code:
type Hitable interface {
    Hit(r *Ray, tMin float64, tMax float64) (bool, HitRecord)
}
Here the Hitable interface defines the Hit method which the Sphere struct implicitly implements:
func (s *Sphere) Hit(r *Ray, tMin float64, tMax float64) (bool, HitRecord) {
}
We then define a World struct that also implements this interface and basically delegates to a collection of Hitables:
type World struct {
    Elements []Hitable
}

func (w *World) Hit(r *Ray, tMin float64, tMax float64) (bool, HitRecord) {
    hitAnything := false
    closest := tMax
    record := HitRecord{}

    for _, element := range w.Elements {
        hit, tempRecord := element.Hit(r, tMin, closest)
  ...
This allows us to easily create another sphere and add it to our World:
sphere = p.Sphere{p.Vector{0, 0, -1}, 0.5}
floor  = p.Sphere{p.Vector{0, -100.5, -1}, 100}

world = p.World{[]p.Hitable{&sphere, &floor}}
All of this put together yields the following final image:

Pretty cool.
Update: Part 4 is available here: https://markphelps.me/posts/writing-a-ray-tracer-in-go-part-4/