Writing a Ray Tracer in Go - Part 5
Updated: Sunday, November 21, 2021
This is the 5th and final post of my series on writing a ray/path tracer in Go. Check out the previous parts 1, 2, 3 and 4.
I’m roughly following the e-book Ray Tracing in One Weekend, but translating all of the code into Go.
All of the code for this post can be found on my Github.
Last time we added metal and matte materials, giving us the ability to render the following image:
We’re going to be adding many new features this time around including: glass materials, a movable camera, the ability to change field of view and finally generating a random scene with configurable properties defined at runtime.
Because there is so much to cover since last time, I’m going to brush over much of the math and theory and focus mainly on the Go specific stuff. But don’t worry, there will be plenty of pretty pictures along the way.
Dielectrics Are Hard to See
Dielectrics are materials that are poor conductors of electricity such as water, glass or diamonds. For our purposes however, we are interested in how they reflect and refract light rays that they come in contact with.
Our path tracer will randomly choose between a ray being reflected or refracted and only bounce once per interaction.
There’s not really anything Go specific to our implementation of Dielectric materials. It mostly just follows the code in the book which approximates refraction using Snell’s Law and also the variance of reflectivity with viewing angle using Schlick’s approximation.
Level Up With Go
Thanks for reading! While you're here, sign up to receive a free sample chapter of my upcoming guide: Level Up With Go.
No spam. I promise.
I will say that this feature was the hardest to debug by far, considering that one incorrect value could throw off the entire render. It could be very frustrating when the newly rendered glass didn’t look quite right, but I had no idea which value or method I needed to change to fix it. This is definitely an area that I would invest in unit testing if I did this over.
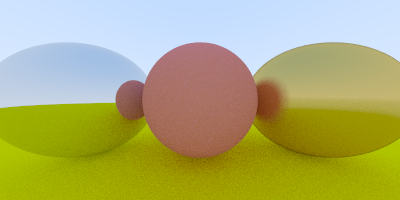
After several tries and re-writes however, I finally got a render which looked correct:
Movable Camera/Fov and Constructors in Go
Another equally difficult feature to debug is adding a movable camera and adjustable field of view. This again is a situation where a single incorrect value could throw off the whole image. Having good unit test coverage on the Vector math and calculations done inside the Camera constructor would have been extremely helpful.
Speaking of constructors, Go doesn’t really have constructors like Java or other languages do. Instead, a constructor in Go is simply a factory function that follows the convention of beginning with New*, such as NewCamera. There is nothing stopping me from naming the function something different, it’s simply a convention that Go programmers share. These functions are typically used when the normal way of creating an instance of a struct with the default values would not make sense, like with our camera. Creating a camera that both looks at and from the origin, with zero degree field of view would not be very helpful. Also, as you may notice there is a lot of complexity contained within the NewCamera function that doesn’t really make sense to live anywhere else since it is only to occur once at creation time.
Playing around with different values for the lookFrom Vector and vFov(vertical field of view) values led to many interesting results. If I did this over I would probably also figure out a way to print the X, Y and Z axes to the screen as well, since it can be hard to reason about 3D space in your head.
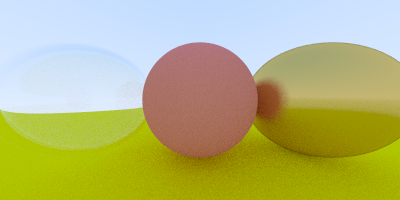
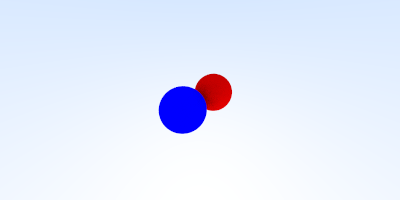
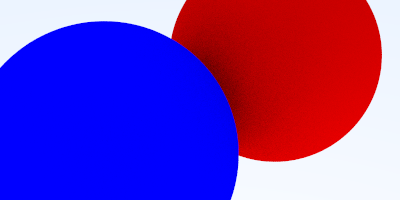
Here are two pictures of the same scene but with different fields of view. The first image is rendered with a 90 degree FOV, while the second is with 20 degrees:
More Spheres, More Configuration
Finally, all the pieces were there to have a fully functional path tracer. The next thing I did was write a function that generates 400+ smaller spheres of varying materials and colors, along with 3 larger spheres (one for each material) into a ‘final’ scene. I’m not going to pretend that I made all this code up, as it was pretty much a straight port from the book. One change I did make however was to include an init function that seeds the Rand type with a new seed each time the program runs so that the scene is always different. Otherwise, the program would simply use the same ‘random’ values each run and the location/color of the smaller spheres would be the same.
Here’s the first image that was generated with the addition of the random spheres:
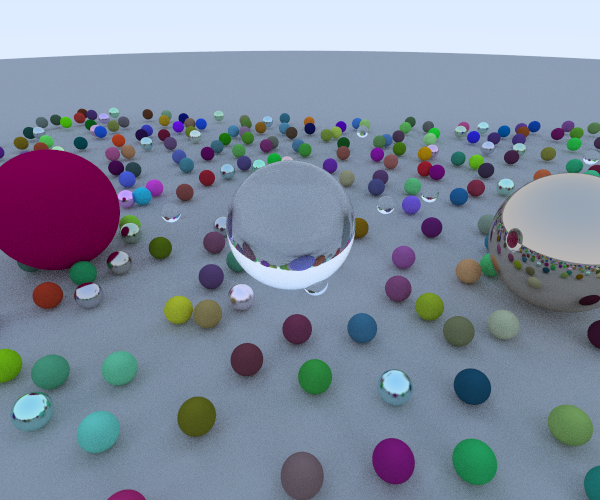
While that is pretty neat, I soon realized that I also wanted to have the ability to configure several of the properties at runtime in order to change the image without having to re-compile. This was a departure from the book and required me to do some reading up on the Go flag documentation.
The flag package in Go implements command-line parsing in an abstract way that works for multiple OS’s. It also generates friendly help documentation for your program when you pass it the --help arguments.
For example, after building the program, running it with ./go-trace --help yields the following results:
$ ./go-trace --help
Usage of ./go-trace:
  -aperture float
        camera aperture (default 0.01)
  -fov float
        vertical field of view (degrees) (default 75)
  -height int
        height of image (default 500)
  -out string
        output filename (default "out.ppm")
  -samples int
        number of samples for anti-aliasing (default 100)
  -width int
        width of image (default 600)
  -x float
        look from X (default 10)
  -y float
        look from Y (default 4)
  -z float
        look from Z (default 6)
As you can see, I added several options to change the look from vector as well as the image size and filename and even the field of view, camera aperture and number of samples per pixel for anti-aliasing. This was all made very simple with help from the Go flag package.
After adding these configuration properties, I needed to figure out a way to have them be accessible to various functions in my program. Initially I simply passed each configuration variable around separately to each function that required it in main, but this soon got unwieldy and quite ugly. I decided that I needed a container for these properties so that I could pass around a single variable and still have access to the needed properties in each method.
I came across this presentation from 2012, ‘10 things you (probably) don’t know about Go’ and found out that Go had the ability to create anonymous structs. This was exactly what I needed as I could create a config variable that was actually a struct containing my configuration properties. Better yet, the Go flag package supports passing objects by reference in it’s *Var methods. This resulted in a pretty elegant solution for both defining and parsing configuration flags and allowing them to be easily accessible throughout the program.
After playing with the various configuration properties at runtime, I rendered a version of the scene that I thought looked pretty cool:
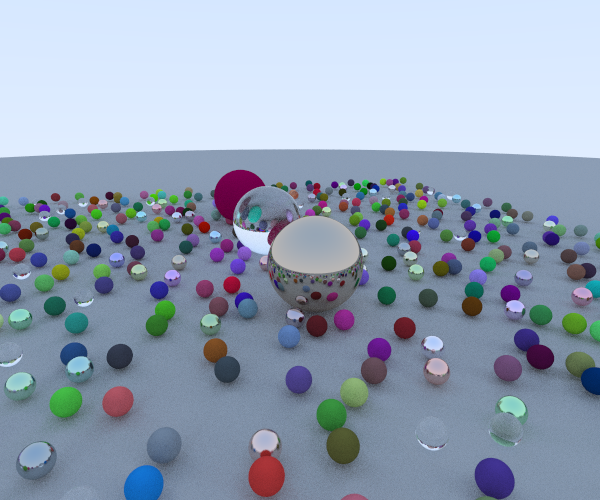
Cool enough in fact that I decided to render a ‘retina’ image of size 2560 x 1600 using the command ./go-trace -out background.ppm -fov 70 -width 2560 -height 1600 and use the result as my background. In case you are wondering, this render took almost 2 hours on my 4 core Macbook 15" with a 2.7 GHz Core i5.
Wrap Up
All in all, I think this exercise was extremely beneficial in not only allowing me to get a beginning understanding of the Go language and idioms, but also a rudimentary understanding of how Ray/Path tracers work. I would recommend that anyone looking to learn Go or any language, starts with a similarly sized/scoped project as it wasn’t too large and also allowed me to get out of my comfort zone a little bit.
Please let me know if you found this series interesting, or if there is anything you would like to read about in the future. I plan to continue learning and experimenting with Go, so look for more Go related posts in the future.
Thanks for reading!